
Amigurumi, Food, Free Patterns
Free Strawberry Plushie Amigurumi Crochet Pattern
Mar
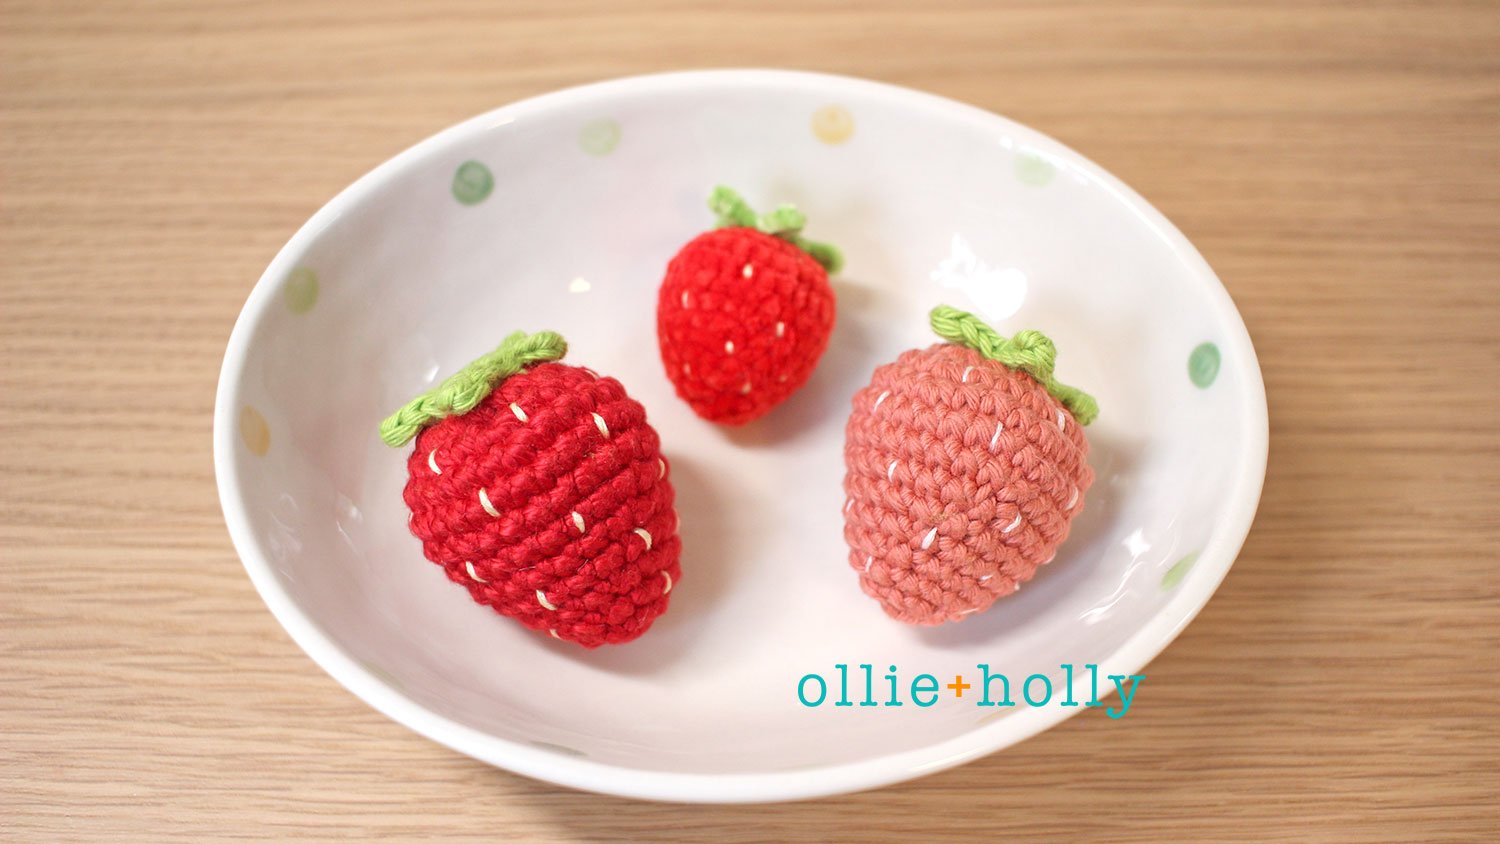
Who doesn’t love a plump, juicy strawberry—especially one that never goes bad? If you’re looking for a fun and beginner-friendly crochet project, my new amigurumi crochet strawberry pattern is the perfect pick! Whether you want to add a touch of fruity charm to your decor, create cute play food, or make a sweet gift, this is the pattern for you!
This pattern is extremely versatile. When made with Worsted weight yarn (Medium 4), this amigurumi strawberry toy is the size of a real strawberry. When made with Super Bulky (6) weight yarn, it turns into a berry cute plushie!

Note: To protect my work, I have disabled right click and printing on my site because I have experienced theft in the past. Please do not copy my patterns in any way. By copying or distributing my patterns without permission, you are making it difficult for designers like me to continue doing what I love. Doing so also discourages me and will prompt me to stop sharing my patterns freely. If you wish to utilize the free patterns, you may do so on my site. Thank you so much for your understanding and for being respectful!
If you have an issue with how I choose to share my free patterns on my site, read this.
If you wish to print out this pattern, you’ll find it as a part of the Sophie the Soufflé Pancakes pattern. I made this strawberry as a part of my Sophie the Soufflé Pancakes pattern, and you’ll be able to find the full pattern collection in my shop! This pattern collection includes all of the toppings as well as the pancakes itself.
By purchasing the printable version, you are supporting me directly. Your support allows me to continue to create new patterns and maintain the site! 🙂

To translate this post, you can copy the URL and paste it into Google Translate to translate the entire page. Without further ado, let’s get into the pattern!
New to Amigurumi? Find video tutorials on my YouTube Channel!
**Disclosure: Some of the links in this post are affiliate links. This means that, at no additional costs to you, I will earn a commission if you click through and make a purchase. You can read a little more about that here!
Yarn I Used
I used WeCrochet Shine Worsted yarn for my strawberries. I find the sheen of the yarn itself makes the strawberries look extra scrumptious.
This pattern is a great stash buster to use up any scrap red and green yarn you may have on hand. Feel free use any yarn as long as you correspond your hook to the weight of your yarn. You can also easily size up/down by using thicker/thinner yarn, just make sure to change the size of your hook accordingly.
Gauge
5 Round Circle = 1.5” with a 2.75mm (C) hook
Note: I am working with the x-stitch (yarn under/yarn over single crochet). If you are working a standard sc, go down a hook size.
Gauge isn’t super important for amigurumi, but I included it just in case you want to check your gauge. Being a little off should not affect the final product too much. You can learn more about how to measure gauge for amigurumi here!
How to Crochet a Strawberry Plushie – Free Amigurumi Pattern 🍓✨
The difficulty level of this pattern is Beginner and this pattern is written in US crochet terminology. All the photos in this pattern are worked right-handed.
If you have any questions, you can also reach out to me for help. I will respond quickest through DMs on Instagram, but you can also just fill out a contact form here.
The finished strawberry measures to be roughly 2.75 in (4.5 cm) tall if you use similar weight of yarn as me and match my gauge.
Please do not reprint, sell or claim the pattern as your own. If you wish to share this pattern, you may link to the free pattern on the blog. Please do not copy and post the pattern onto your site.
TERMINOLOGY
st(s): stitch(es)
ch: chain
sl st: slip stitch
sc: single crochet
inc: two single crochet in one stitch
dec: invisible decrease- single crochet two stitches together through the front loops only
BLO: work into the back loops only
(…) x #: repeat anything in the parenthesis however many times the number indicates
[#]: total number of stitches for that row
#sc/inc: one sc/inc in the following # stitches
THINGS YOU NEED
- WeCrochet Shine Worsted (Medium #4, or 10-ply) yarn – I’m using the colours Serrano and Peapod.
- 2.75mm (C) Crochet Hook – Adjust the hook size according to your tension/yarn weight
- Scissors
- Darning Needle
- Locking Stitch Markers
- Polyester Stuffing
- Sewing Pins to help with sewing
- DMC 6-Strand Embroidery Floss – Light Pale Yellow (DMC 745)
- Embroidery Needle

Notes & Guides
This pattern is worked in continuous rounds unless otherwise stated. Mark the first stitch of the round with a stitch marker to help keep track of where the beginning of the round is.
Closing the Hole – To close the hole, fasten off and thread the yarn tail onto a darning needle. Insert the needle under the front loop of the next stitch and pull through. Repeat with the rest of the stitches, then pull on the tail to close the hole. Weave the tail into the centre of the hole to hide the tail.
Sewing Amigurumi Parts Together – Pin the loose part (the Ear in the photo example below, which I will be calling A) onto the base part (Head, B).
Thread the yarn tail from A onto a darning needle. *Insert the needle into B, immediately beneath the yarn tail and out the next space on B immediately below the next stitch of A. Pull through, then insert the needle through both loops of the next stitch of A. Repeat the steps starting from the *, going all the way around A. Thread the tail through B to hide the yarn tail.

STRAWBERRY
With Serrano yarn.
1 6sc in magic circle [6]
2 6inc [12]
3 (sc, inc) x 6 [18]
4 (2sc, inc) x 6 [24]
5 (3sc, inc) x 6 [30]
6 sc in all sts [30]
7 (8sc, dec) x 3 [27]
If you are using safety eyes, insert them between rounds 6 & 7, leaving 4-5 sts between the eyes. Snap the backings in fully.
8 (7sc, dec) x 3 [24]
9 (6sc, dec) x 3 [21]
10 (5sc, dec) x 3 [18]
11 (4sc, dec) x 3 [15]
12 (3sc, dec) x 3 [12]
13 (2sc, dec) x 3 [9]
Stuff fully, fasten off, close the hole, and weave the tail in. With light pale-yellow embroidery floss (DMC 745) and an embroidery needle, embroider short lines all over, alternating the placement of the lines.

STRAWBERRY LEAF
With Peapod yarn.
1 5sc in magic circle [5] Note: Make the tail of the magic circle a little longer so that you can use this tail to sew the centre of the leaf to the top of the strawberry.
2 Work into the BLO for this round: ({sl st, ch 3, start in the 2nd ch from the hook: 2 sl st, back into the same st: sl st} in the next st) x 5, sl st to the first st [5 leaves]
Fasten off and weave the tail back into the same st the final sl st is worked into. Use the two tails to sew the leaf to the top of the strawberry, then weave the tail in.


Please leave me a comment down below (or contact me) if you have any questions about this pattern. I would also love to see your creation so don’t forget to tag me (@olliehollycrochet) on Instagram or use the #olliehollycrochet! Follow me on Instagram to get updates on new patterns and to see what I’m up to on a daily.
If you find any mistakes in the pattern, please contact me and let me know! My testers and I do our best to catch my mistakes, but we will still miss things here and there. Also, I will sometimes make mistakes while formatting the blog post.
You may sell products made from this pattern in small quantities but please clearly credit the design to me, Abby Sy of Ollie + Holly and provide a link to my blog www.OllieHolly.com. Permission is NOT granted for mass production or factory manufacturing of any kind. Thank you for being respectful and for your understanding!
Please do not reprint, sell or claim the pattern as your own. If you wish to share this pattern, you may link to the shop or the free blog post. Please do not copy and post the pattern onto your site.

Fluffy Soufflé Pancakes Stack Amigurumi Crochet (Pattern Only)

